i thought i's share the odd quilt block tutorial here on the blog. it's so useful to have a few up your sleeve for making a cushion, a trivet, a mini wall quilt, or to make en masse and turn into a full quilt.
here’s how to make a traditional “square in a star” quilt block:

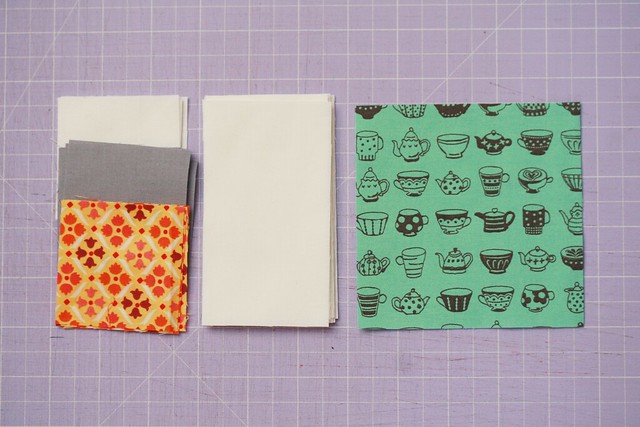
for the purposes of this tutorial, i’ll refer to the fabrics as follows:
white = fabric 1
grey = fabric 2
orange = fabric 3
aqua = fabric 4
white = fabric 1
grey = fabric 2
orange = fabric 3
aqua = fabric 4
cutting
from fabric 1, cut 12 rectangles measuring 2.5″ x 4.5″, and 4 squares measuring 2.5″ x 2.5″
from fabric 2, cut 8 squares measuring 2.5″ x 2.5″
from fabric 3, cut 4 squares measuring 2.5″ x 2.5″
from fabric 4, cut 1 square, measuring 4.5″ x 4.5″
piecing
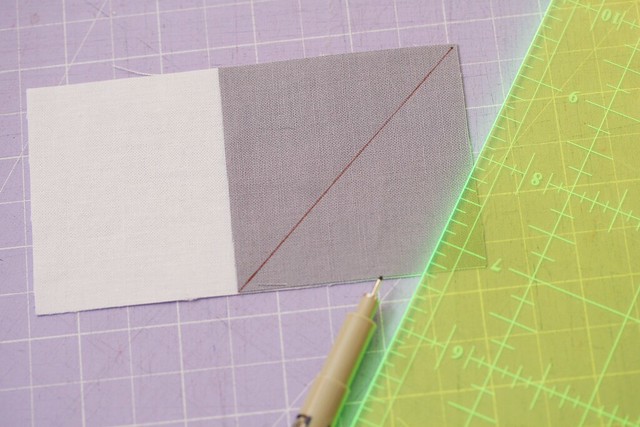
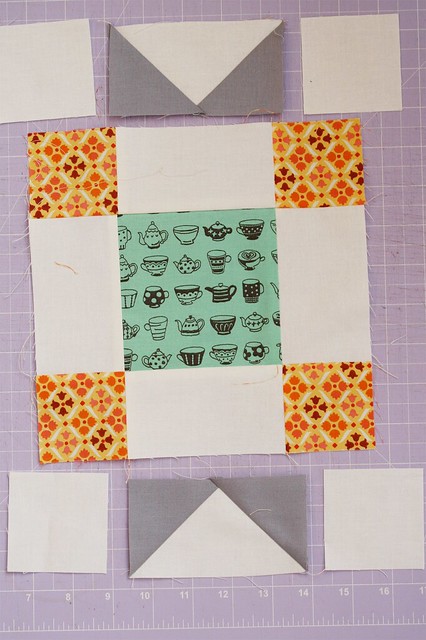
take one of your fabric 1 rectangles and lay it right side up on your cutting mat.
take one of your fabric 1 rectangles and lay it right side up on your cutting mat.
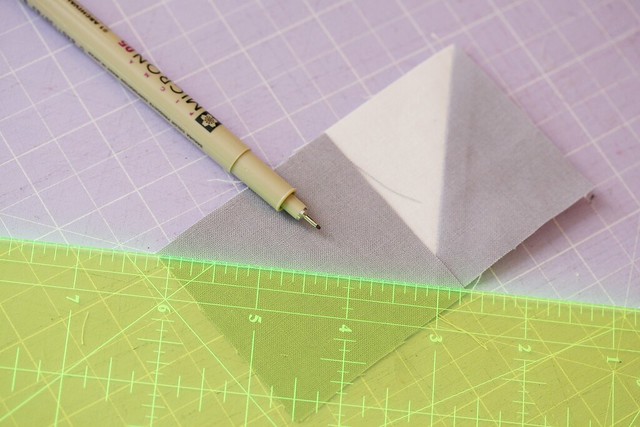
place a piece of fabric 2, right side down on top of it, so that one of it’s edges lines up exactly with the end of the rectangle.
mark a line bisecting the piece of fabric 2 diagonally as shown below:
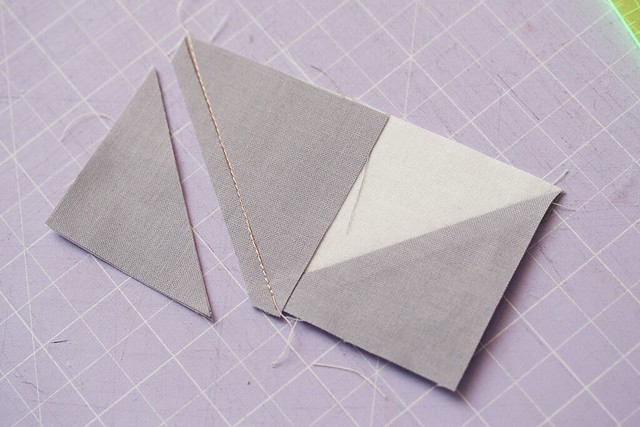
sew along that line, then cut off excess fabric, leaving a 1/4″ seam allowance.
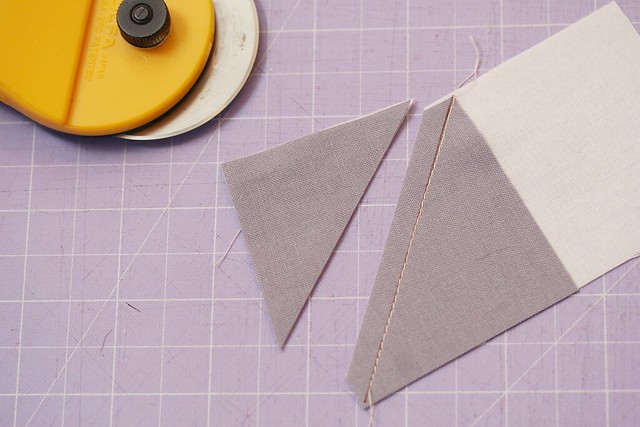
press open.
repeat this process for the other end of the rectangle.
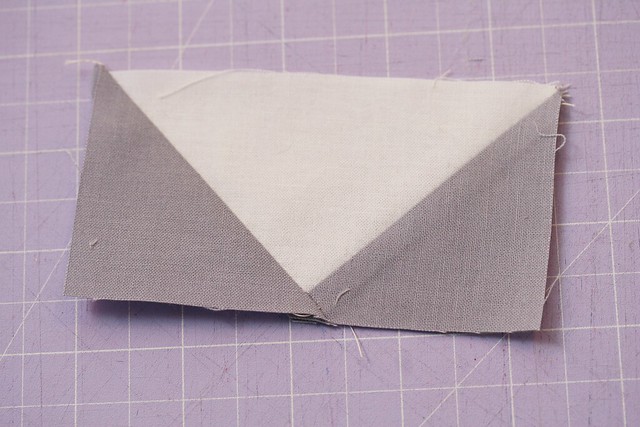
you will end up with a rectangle that looks like a pointy pair of cat’s ears:
take another white rectangle, and sew a square of fabric 3 to each short end. press.
repeat so that you have two of these.
repeat so that you have two of these.
take another fabric 1 rectangle, and sew the long edge to the side of your piece of fabric 4. press.
repeat with the opposite side of the same piece of fabric 4.
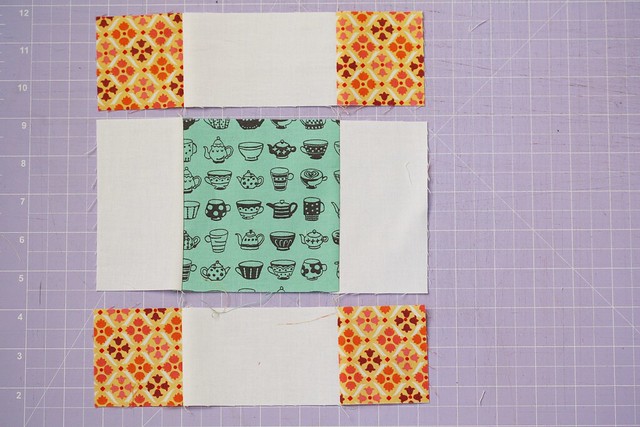
sew the strips made up of fabric 1 and fabric 3 to the top and bottom of your piece made up of fabric 1 and 4, creating a square.
take two squares of fabric 1, and sew one to each short end of one of your “cat’s ears” rectangles. press.
repeat, so that you have two identical pieces.
sew these to the top and bottom of your pieced square.
take a rectangle of fabric 1, and sew it’s short end to a short end of one of your “cat’s ears” rectangles.
sew another rectangle to the opposite end in the same way. press.
repeat with your final “cat’s ears” rectangle.
sew these to either side of your block, completing the star shape.
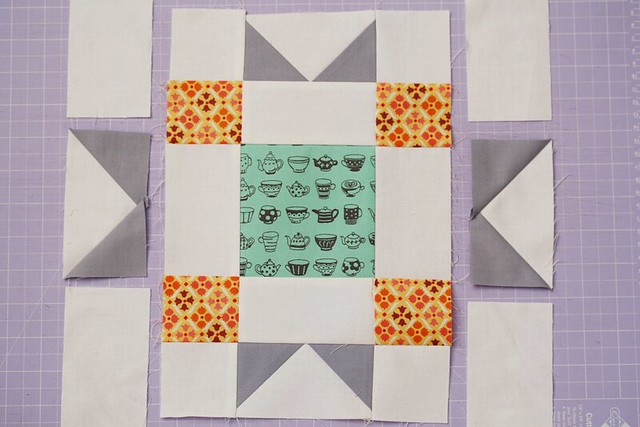
your block is now complete!
there are many variations you can make to this block.
for example, for a simpler look, you could use more of fabric 2 in place of fabric 3, creating a more cohesive star shape.
you could make the block look more ‘filled in’ by substituting another coloured fabric for the white rectangles surrounding the central square.
whatever you choose to do with it, i hope you find this a very useful block.
if you end up using it to make your own quilted creations, i’d love to see pictures!
have fun!