Tuesday 17 July 2012

tutorial: 'broken dishes' quilt block

i think it's time for another quilt block tutorial, don't you? this one is called ‘broken dishes’. it's a really simple block to make and would be a really good choice for a first quilt.

to get started, you need:

  • a fabric pen
  • a rotary cutter and mat
  • a quilting ruler
  • a sewing machine

got that? ok, here goes!

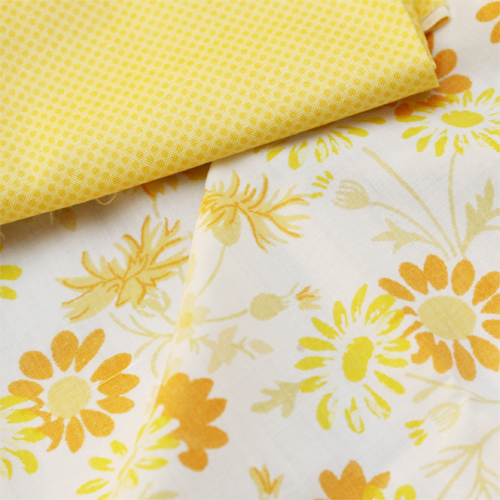
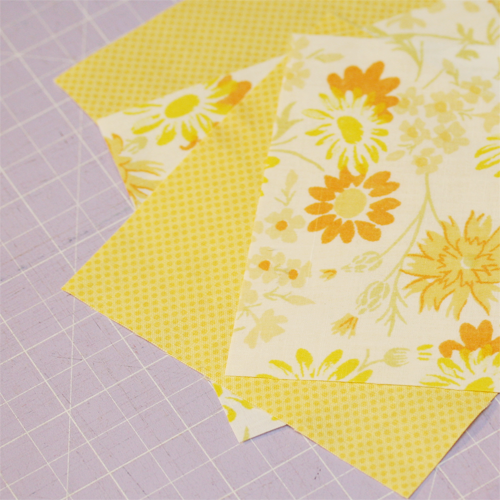
first, choose two complimentary fabrics


cut two 5″ square blocks from each of your two fabrics


take one square of each fabric, and lay them on top of each other, right sides together, on your mat.

lining your ruler up with opposite points of the top square, draw a line with your fabric pen that bisects the square diagonally.


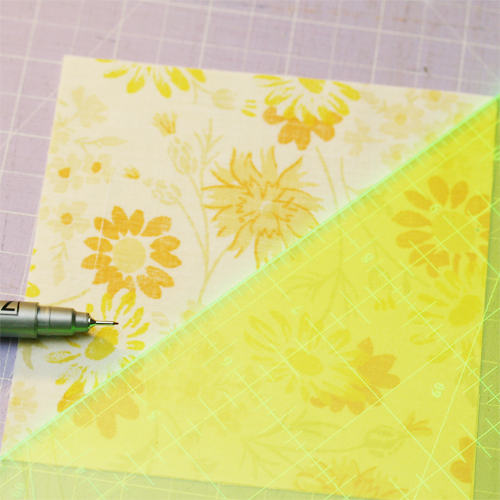
using your quilting ruler and pen, mark a line 1/4″ from either side of the one you drew in the previous step.


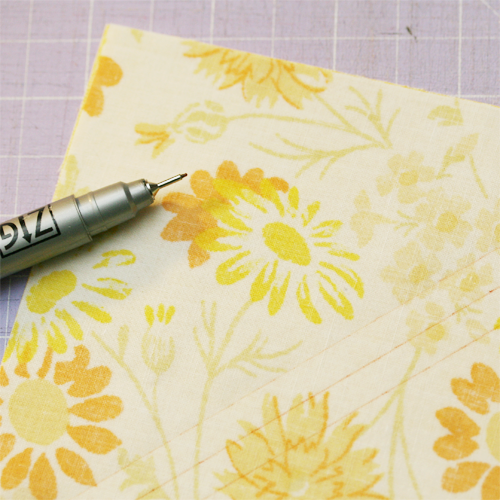
make sure your two pieces of fabric are directly on top of each other, then pin them in place.

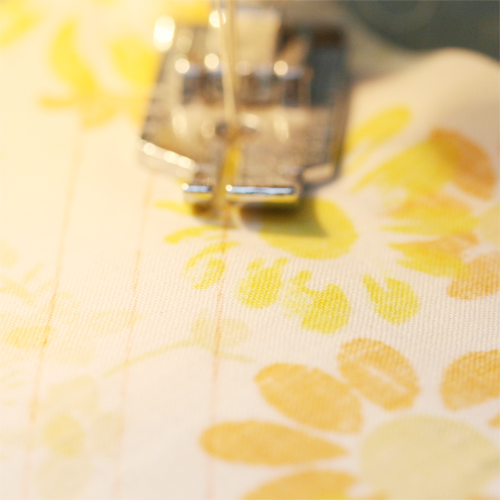
using your sewing machine, sew along each of the outer lines that you just drew.


using your quilting ruler and rotary cutter, cut along the original diagonal line you drew.


the two pieces you now have will open out into squares comprised of two contrasting triangles. press them open and trim the little bits of seam that stick out from either side of the square.

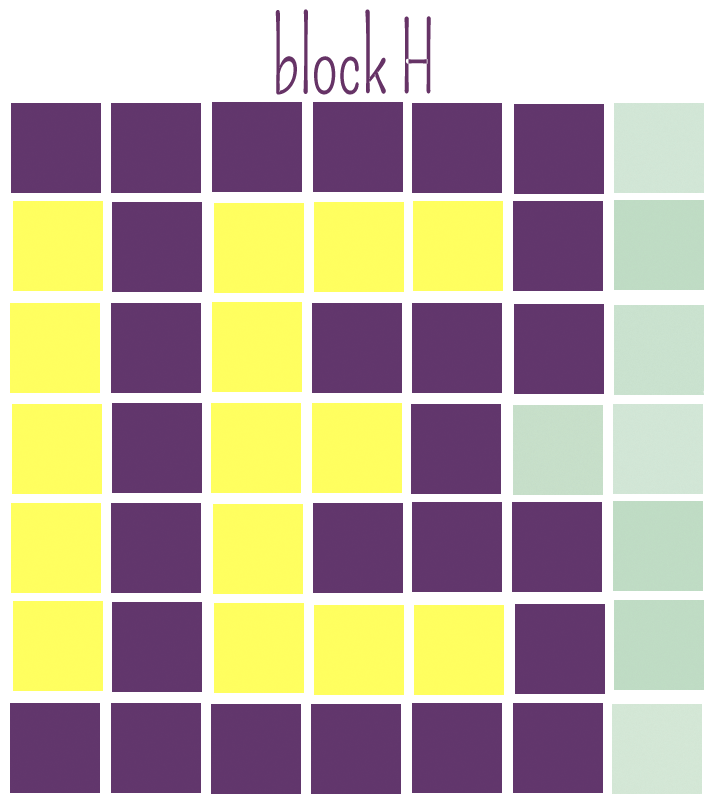
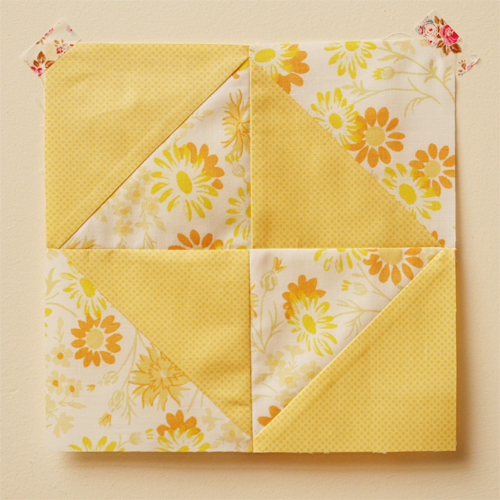
repeat this whole process so that you have four squares. lay them out on your mat so that they make the broken dishes pattern.


sew the top left square to the bottom left square to make a rectangle. repeat this with the top right and bottom right squares.


finally, sew the left rectangle to the right rectangle, and you have your completed 8″ block.


i can make a couple of these blocks while the baby has a nap - that’s how quick they are!
hope you’ll find this useful,

Thursday 12 July 2012

tutorial: scrappy wall quilt


some months ago, i participated in a scrap swap with some lovely crafty people on instagram. i received some beautiful little pieces of fabric, that might otherwise have ended up unused, and decided to team them with bits from my own vast scrap collection to make a wall quilt for our bedroom.
it's a pretty straightforward project, so i thought i'd share a quick tutorial here...


scrappy wall quilt

what you'll need

81 white or cream fabric scraps, cut into 1.5 inch squares
402 coloured fabric scraps, cut into 1.5 inch squares
30 x 30 inch piece of backing fabric
30 x 30 inch piece of quilt batting (i used an offcut from another quilting project)
1 skein of cream coloured stranded embroidery floss
1.2m bias binding in a colour or print that complements your scrap collection
sharp scissors
a sewing machine with bobbin and cotton (i aways use gutermann thread, and find cream is the best colour for scrappy projects)
quilting safety pins
a quilting or embroidery needle


what to do

  • using your sewing machine, and working with 1/4 inch seams, piece your blocks according to the diagrams below:


  • sew blocks into rows as shown in the following diagram, then sew the rows together to complete your quilt top


  • lay your backing fabric right side down on a flat surface (the floor, or kitchen bench is ideal), smoothing it out so that it is perfectly flat
  • place your quilt batting on top, smoothing again as you go
  • finally, place your pieced quilt top, right side up, on the batting.
  • working from the middle towards the edges, carefully pin these three layers together with your quilting safety pins (i usually put roughly one pin per 3 inches square. you can't really over-pin, so if in doubt, err on the side of caution.)
  • thread your needle with two strands of floss, and stitch a small X at the point of each square on your quilt as pictured below. 
top: begin to make your X, leaving a 1 inch tail at the back for tying off
bottom: complete your X, and tie off at the back with a strong double knot. then trim the ends to approx 1/4 inch long

  • remove saftey pins as each section is quilted.
  • using a very sharp pair of scissors, trim the backing and batting of your quilt so they are even with the edge of the top
  • now bind your quilt using your preferred method (if you have not bound a quilt before, this tutorial is a good one to start with, otherwise have a look for on youtube where there are heaps of good demonstrations to be found).
  • your quilt is now complete, and ready to hang.

further notes
  1. where scrap size permitted, i tried to "fussy cut" my fabric squares, to pick out interesting or pretty motifs such as the fern, horse, and squirrel below.
  2. the reason i chose this, frankly MUCH more time consuming method of quilting, is because of the very small pieces of fabric. quilting over the individual squares would have obscured all the tiny details to be found in the prints, which to my mind would have defeated the purpose of the quilt. 
  3. if you'd like to see what other people have made with their scraps, have a look at the #inchbyinchquilt hashtag on instagram - there are some beauties there!

i hope you have a go at this project. it's lovely to revisit old favourite fabrics, and work with them all over again, and the finished piece looks very cosy and, well... homey on the wall.

do drop me a comment or an email if you make your own - i'd very much love to see it!